Showing posts with label DIY. Show all posts

Thursday, May 3, 2012

Front Porch Makeover:: Before and After

Last week I painted the inside of the front door black, click here to see the before and after.  It was so nice to finally get a coat of paint on those orange-y oak colored doors!  
My next project was to beautify the other side of those doors and make our front porch look a little more welcoming.  We come in through the garage so I hadn't noticed how neglected it was looking until we started working on the flower beds in the front. 
Here's a pic right after we bought the house.  That's the original 1970's avocado green paint on the trim, shutters and front door. And those two bushes were the only landscaping in the front. 
Sorry about the quality of this photo.....it's an iPhone picture of a picture. ;)
Shortly after moving in we took down the shutters, painted the trim a creamy off white color to go with the brick and painted the front door dark brown.  Or what I thought was dark brown but it turned out to be more like chocolate brown with a green hue that I lovingly referred to as baby poop brown.
Ok it doesn't look that bad in the picture. 
So the first step was to paint the front door black.  I sanded down all the flat panel pieces which is what you see in the photo above. 
I put the first coat on last Tuesday while the boys were at school. 
And here's what it looked like after painting the sides which took me two hours.  
It takes along time to paint all those curves next to the glass! 

It looked like this for the next 5 days due to high humidity.  
In the meantime, I planted flowers in my planters.   
 And here it is after two coats of black paint!  
I love how it looks so nice and clean and less baby poop-y.

I added a new Ballard Designs Geometric indoor/outdoor rug I scoured for $19! 
They still have them on sale if you want one! 
 Here's a closeup of what I planted: lambs ear on the left which was free (I transplanted it from my flower bed in the backyard), purple Coleus ($1), and white Geraniums ($1 on clearance).  
Not bad for $2!!
It looks so much better!
Now I won't be embarrassed when we have company over and they come in through the front door. 
BEFORE
AFTER

I hope you enjoyed my latest before and after project, I'm really happy with it.  I just hope I can remember to water those flowers!!!
Linking up to the parties on my sidebar.
~Beth

Wednesday, April 25, 2012

Black Interior Front Door: Before & After

I know I haven't posted since March but I'm still here.  And my camera is still broken and that's why I haven't been blogging because I didn't want to subject you guys to my fuzzy iphone pictures with bad lighting.  But I'm going to anyway because I finished a project and I wanted to share it with you!

Last month I showed you a few photos I found on Pinterest of black interior front doors.  
Here's one of the photos of a front door that I think looks very similar to mine.


So I ran to my local Lowe's and had the paint guy mix a quart of Valspar paint in black.  Well actually he wanted me to choose one of the colors from the paint chip area but I couldn't find a black that didn't look blue or purple or have some other kind of tint to it.  I told him I just wanted black so he said he could just add black to the can if I wanted.   Ummm, yes please!  So the paint doesn't have an actual name, it's just "plain ole black".  
So here's a nice fuzzy picture for you to see what I was starting with.  Wood doors with the original 1970's stain on it.
And here it is after I primed it.  I was actually considered painting it white and after seeing the white primer, I knew black would look so much better.
And here it is now.....
And another one.....
I love it and wish I had painted it sooner!
Now I'm working on the other side, the front.  The part that people actually see!  I started on it yesterday and I plan to finish it today when the boys take their nap since it's currently outlined in blue painters tape.  ;)
~Beth

Friday, March 2, 2012

Chair Makeover: Painting Fabric

I received this chair from my husband's grandmother approximately 6 years ago.  I wish I had a picture of it when I first got it but I sent it straight to the upholsterer to have it recovered.
At the time I had a lot of Red and Gold in my house so I chose a paisley print in reds, golds and greens.  He did a great job and I was smitten with my new chair.  
That is until a couple of years ago when I decided to update my decor with a lighter color palette using blues, grays, and whites. 
Here's a Before photo (not bad, just no longer what I wanted).
 
I didn't want to pay someone to recover it again and I wasn't sure I could do a good job so I decided to just paint it!  I did a search online and found out you can use plain ole latex paint on fabric.  There were plenty of websites that said you could do it, so I did.  
What did I have to lose?  If it didn't work out, it could always be recovered.  
I have plenty of paint samples in varying shades of blue and gray from previous painting projects and decided to mix a few together in hopes to get a close match to a slate blue color in my new duvet cover.

I mixed a dark gray tester paint that I found on the Oops table for $.50 with Martha Stewart's Washed Denim and then added some black craft paint to darken it.
I was trying to get this slate blue color you see in this fabric.  Could be a little darker but close enough!
 My daughter was so excited to help me with this project.  
I gave her a sponge brush and told her to cover all the red.
Too late to turn back now!
This is how she looked after one coat.  I lightly sanded it after it dried to keep it from feeling rough.
After the second coat and still wet.The streaks faded after it dried and after a I lightly sanded it.
And here she is after I painted the trim in Martha Stewart's Nimbus Cloud.

And here she is next to my duvet cover that I was trying to match. 

 
BEFORE

AFTER
So there you have it, I hope you like it! 
I'm so glad I painted it!  It was so quick and easy and actually turned out better than I expected. :)
Hope you have a wonderful Friday!
~Beth


Tuesday, February 28, 2012

Salvaged Wood Headboards: Twin Boys Room

Yesterday I showed you a few headboards I pinned on Pinterest using salvaged wood that I wanted to make for the twins room.  We were able to gather up enough old wood from a pallet and an old fence that our friend was going to throw away. 
(Please note:  be sure to seal up the boards with a non-toxic sealer to prevent off-gassing.  A lot of pallets are treated with insecticide or contain formaldahyde.We used Safecoat Safe Seal to seal up the boards).
Here's a before shot of the boy's nursery as we're pulling everything out of the room.
Complete with semi-naked babies playing with screwdrivers. 
 And here's as shot from the same angle of the new beds and headboards.
And here's a closeup.....
My husband added a push button so the boys can turn the light on/off themselves.  
They love that part!!!

 Here's one of them in the garage, you can see the top ledge/shelf thingy better in this photo.
We bolted the headboard directly to the studs in the wall.
 He's putting his letters on the top shelf.  He loves doing that over and over.
Now he's admiring his work.  Love that kid!
Hope you like our latest project
Linking up at the parties on my side bar....check them out!

Tutorial Coming soon!

~Beth

Thursday, August 25, 2011

Cheap & Easy Wall Art

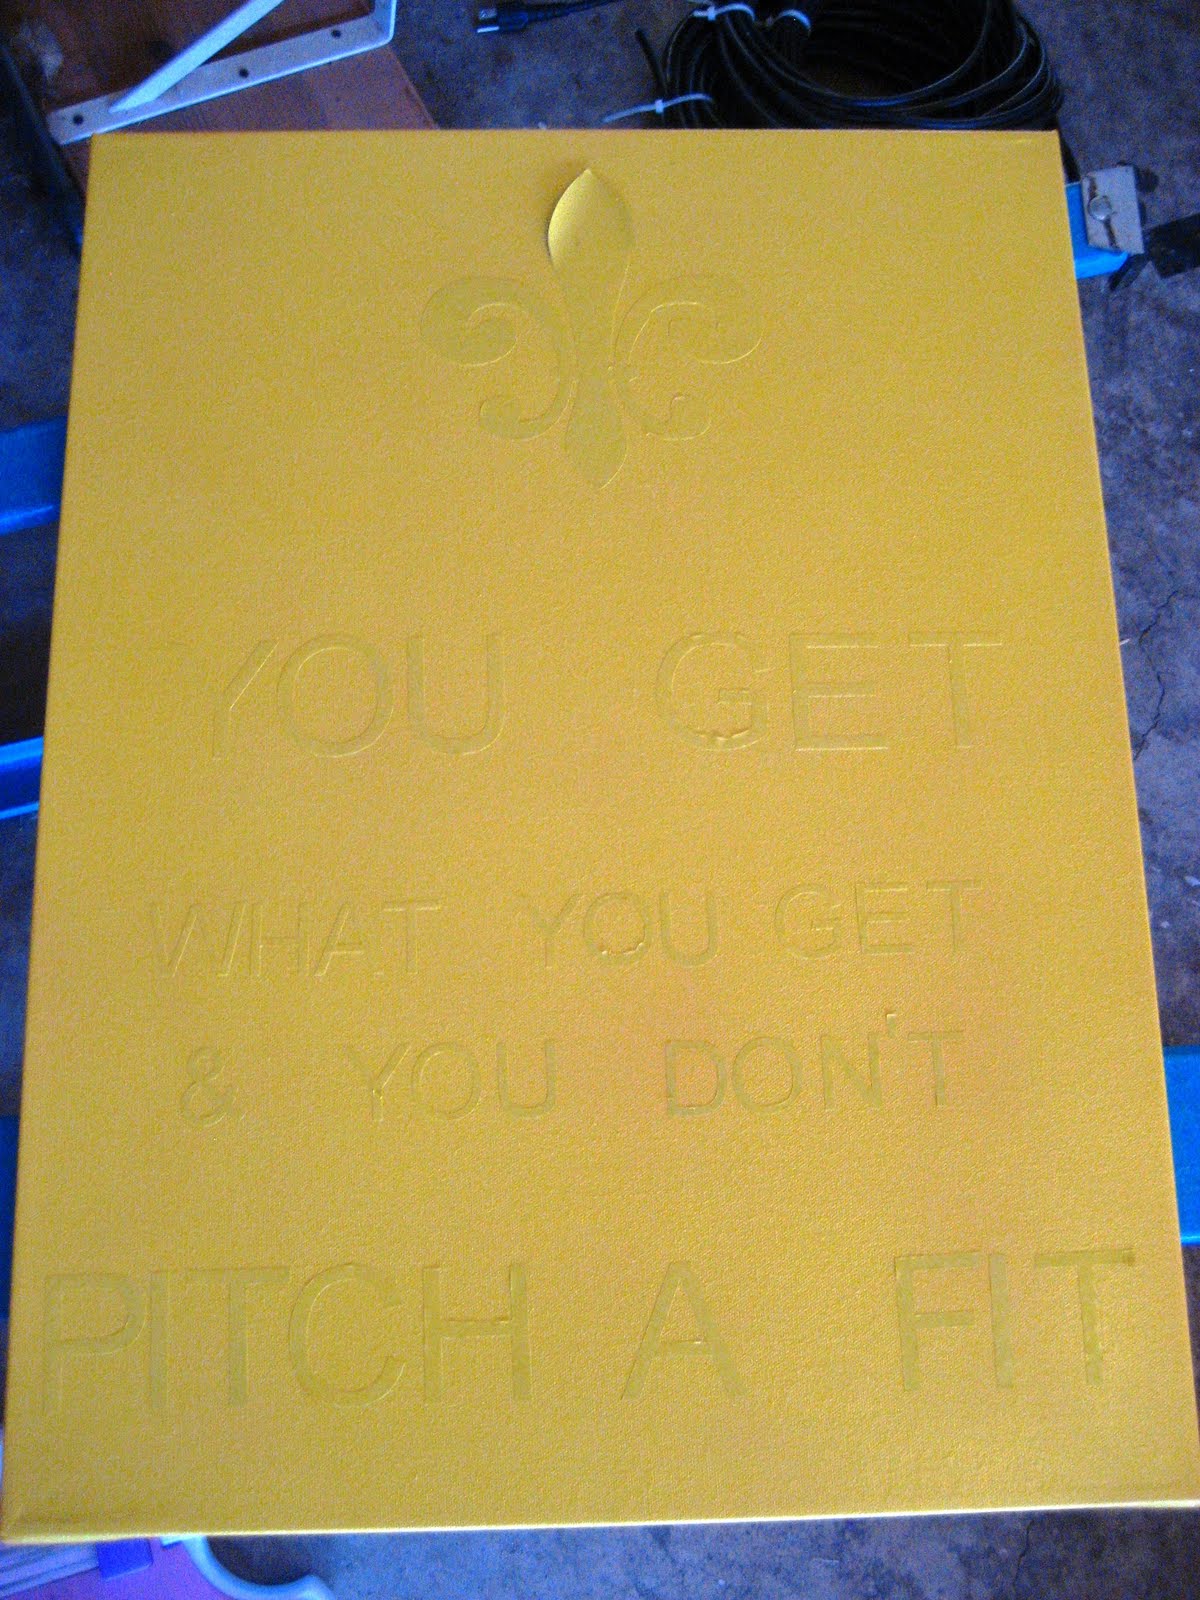
One of my daughter's favorite sayings is "You Get What You Get & You Don't Pitch a Fit!".  She learned it from her preschool teacher last year who she adored. I said this to her one time when I served her  something she wasn't thrilled about eating and it instantly made her smile. And then she said "okay" and started eating what I gave her.  I couldn't believe how easy it was to make her happy just by saying that one little phrase.  And then one day on Pinterest (I know you know them) and found this little gem.
I was like What?!  I can soooo make that.  So I asked one of my friends that has one of those fancy schmanchy vinyl cutting machines if she would make me some vinyl letters and a crown. 
 And she did except for she didn't have a crown so she cut out a Fleur de Lis instead which I think I like better.  Next, I just stuck them on a $5 canvas (18x24) and spray painted over it with yellow paint.
I used Bauhaus Gold by Krylon first (on the right) but it was too gold so I went over it again with Sun Yellow by Rust-Oleum and it was the perfect shade of yellow that I was looking for.
Peeled off the letters..........
...and Ta-Da!  
I know it doesn't look exactly the same as the one on Pinterest but it's close enough.  Actually it's perfect with all of it's imperfectly spaced letters.  Who needs to measure letter spacing??  Not me, I just eye-ball it.  And then spend an hour "fixing it".  Whatev. 
Besides, it makes my daughter smile and that's all that matters.
I hung it on the wall by the kitchen table just in case I need to refer to it when someone doesn't like the food they were served.  
That goes for husbands too!
(please excuse the poor lighting, it was cloudy today)


Thursday, August 11, 2011

Scary Barn Sale Find

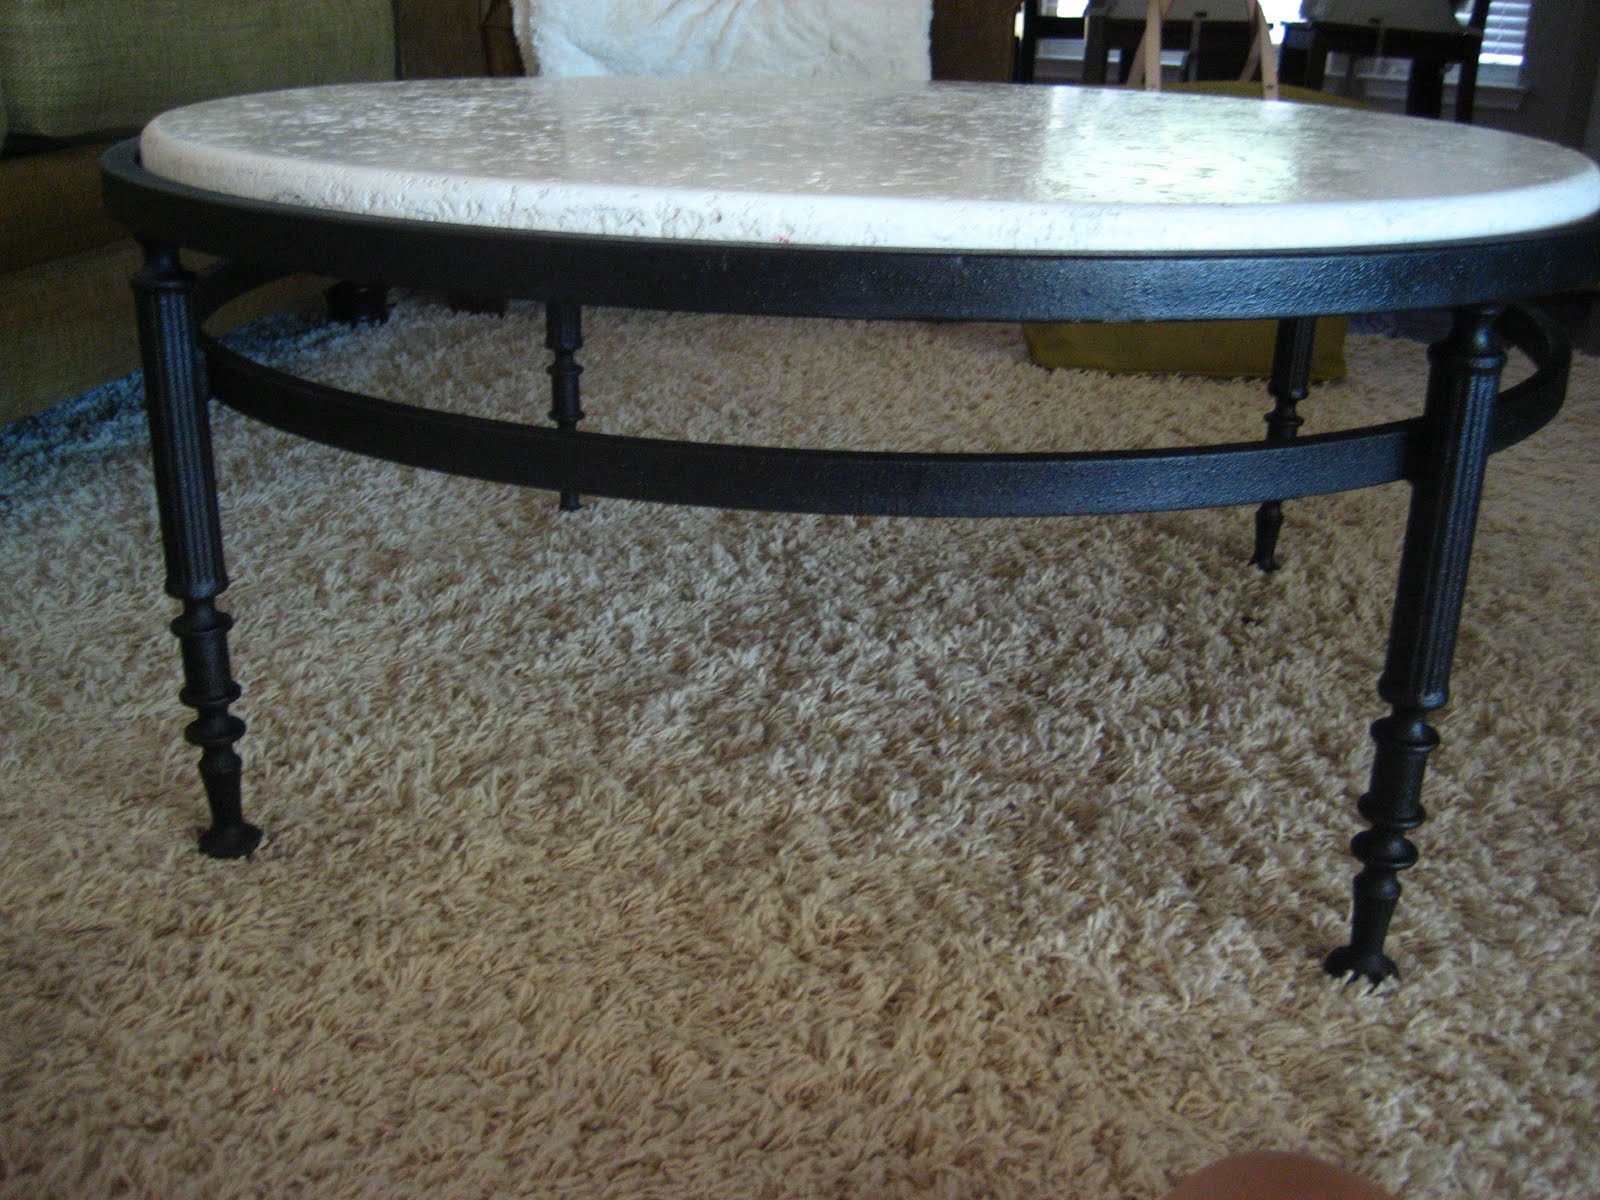
I have been searching high and low for a round coffee table ever since I spied this one over at the Nester's place.  I've been on Craigslist, I've scoured the garage sales and thrift stores but without any luck.  Until one day the curiosity got the best of me and I decided to follow the signs on the corner that said "barn sale".  You see, I intentionally did not go to the "barn sale" the other times I saw the signs because I noticed the same signs were being put up EVERY weekend on the same corner.  I figured it was one of those people that still had leftover junk from the first "barn sale" and just couldn't let go and donate it to the thrift store like most us do.  But like I said I was curious so I went just to cure my "they might have something good" addition when it comes to garage sales.  It was off a country road that lead to a gate with a long dirt driveway that took you past two small homes and then around a small turn to......a barn.  To say the least....I was sceeeered!!!  It sounded like something straight out of that movie The Texas Chainsaw Massacre!  I just knew that as soon as I stepped out of my car someone would snatch me up and keep me forever!  But then I remembered those signs were put up every weekend and if they were actually snatching people up then they would have been busted by now.  Right?  Well that's what I told myself as I got out of the car and headed to the dark and scary barn that ended up having some pretty decent stuff!  A lot of it was junk but there were actually a few nice pieces of furniture and a couple of large mirrors that I had my eye on.  Oh and the person in charge of the barn sale, was actually a nice little old lady.  Unless she was a decoy to get people out of their cars and into the barn??
Anyway, I made my way through the barn looking at the stuff and looking over my shoulder at the same time and wouldn't you know it........I spied a round coffee table!  And I liked it.  And she had another one plus a matching side table!  Score!  I asked her how much they were and she said they weren't for sale because she didn't have anything else to display her stuff on.  What?!  She said she was going to buy folding tables from Wal-mart and that she could call me when she was ready to sell them.  Score!
 
Fast forward two weeks later....she calls me and says she was ready to sell them and wanted to know if I still wanted them.  I asked how much she was asking for them and before she told me I quickly decided that I wouldn't pay more than $20 for the round one.  She told me she would take $18 for all 3!!  Sweeeet!  Oh and she told me they were from a hotel lobby in Dallas!  So cool!  
I was thrilled to say the least.
They were an emerald green color when we bought them.
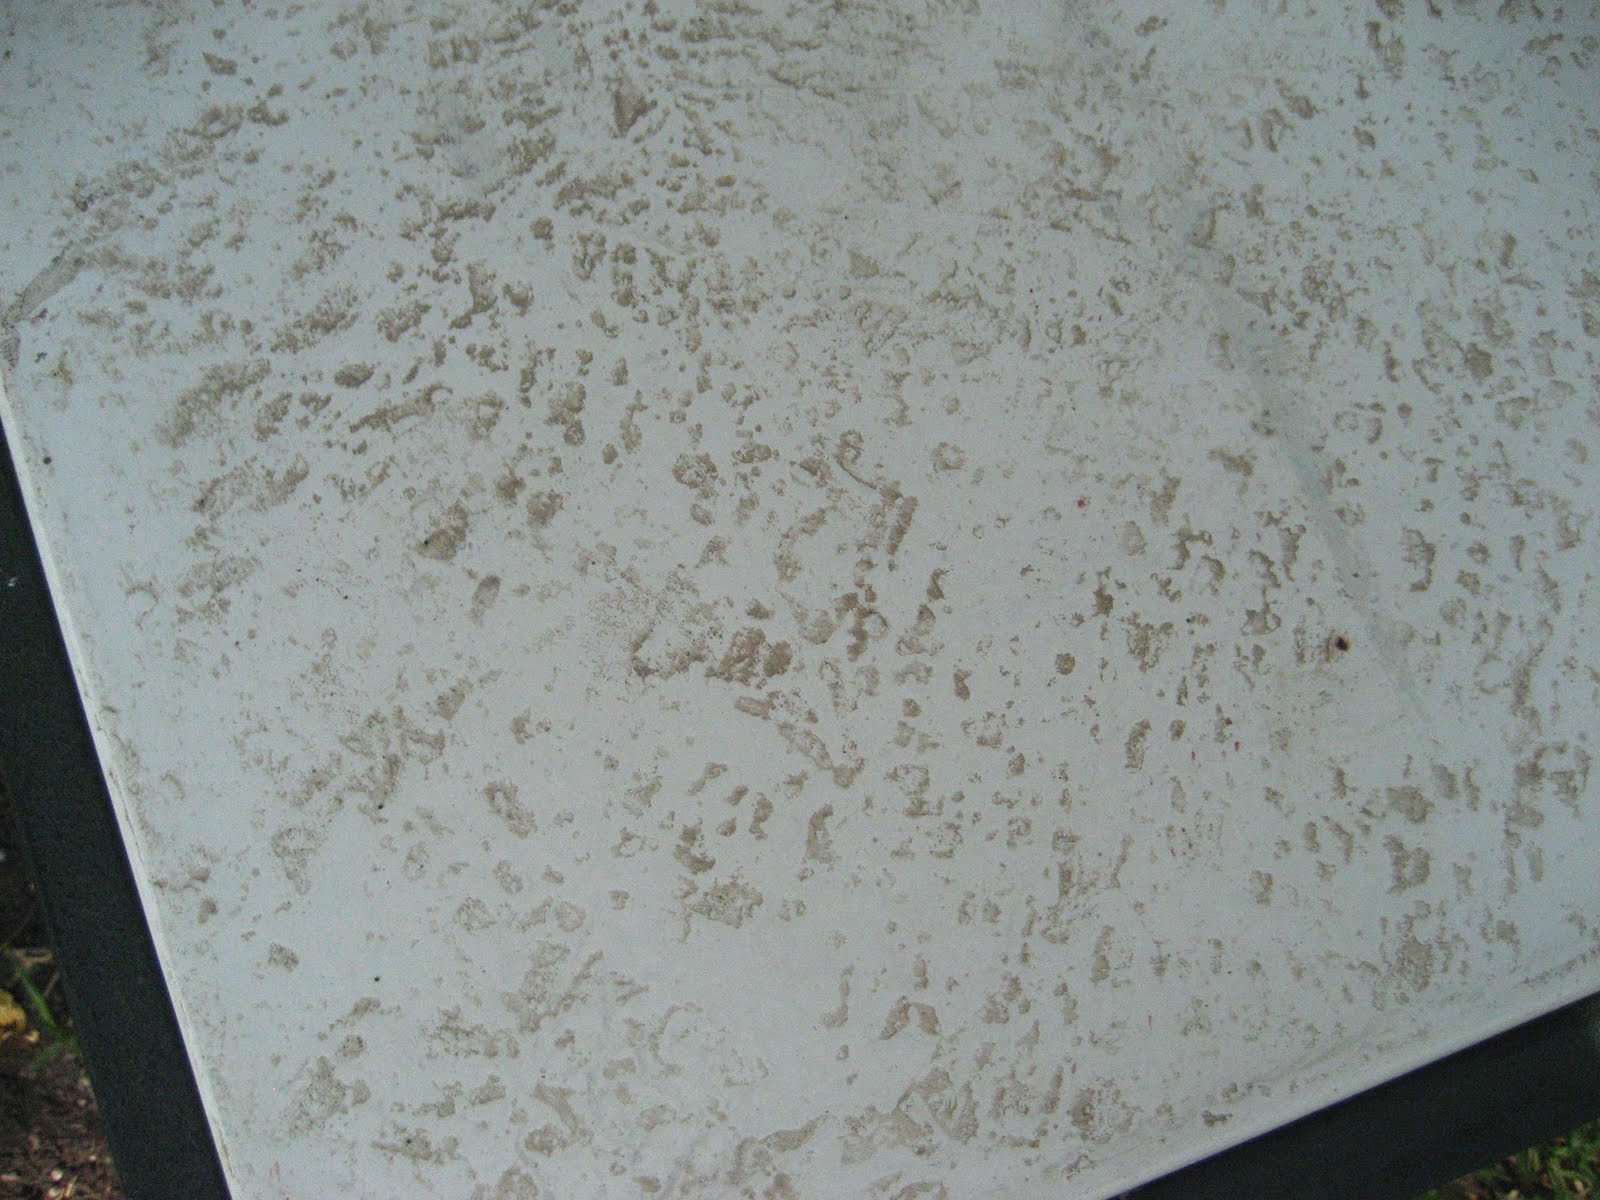
Add very dirty with some kind of weird growth underneath??
It looks like someone glued fake eyelashes in a cirlce.  
I scrubbed the table top which is made of some type of fiberglass made to look like solid stone and spray painted the base with Oil Rubbed Bronze.  Of course!
After
Nice and clean!
And now lives in my living room...
...with my pretty new DIY pillow covers!

You see, sometimes it pays to take a leap of faith or risk your life to get a great deal!!    

What risks have you taken to get a great deal??
Would you happen to know what that growth was underneath the table??? 
I'm partying over here:  Houseofhepworths, Tales From Bloggeritaville, Theshabbycreekcottage